For some time I've been looking at cookie molds over the internet with the idea that it would be a fun way to make cookies or paper creations. I couldn't believe my luck when on my latest trip to the Goodwill store I happened to find two cookie molds. We used them once to make cookies and then decided we would take a try at paper molding (or casting as it may be called).
The activity is pretty simple and only uses a few supplies. First, we sprayed the molds with a nonstick spray to help prevent sticking. Next, we tore 6 or 7 paper towels into 1 inch pieces and put them into a blender. Our second time doing this we also added two half sheets (different colors each) of construction paper. Next, we filled the blender half full of warm water and let the paper soak for a few minutes.
After blending and once we had a watery mix of paper and paper towels (in this photo we had used just paper towels), we were ready for filling the molds.

This part proved to be a fun sensorial experience for my daughters. Placing a towel under the molds, we took handfuls of mixture and filled each mold with the paper mixture. Next, using a large sponge, we firmly pressed the sponges onto the molds to soak up the water and compress the paper into the mold.
The sponges were squeezed out into a bowl. We repeated this until all the water was removed. Also, at this point, extra paper mixture was added into the mold if needed.
I placed the molds into our toaster oven at 200 degrees for about 20 minutes (keeping a careful eye on things) to dry them quickly.
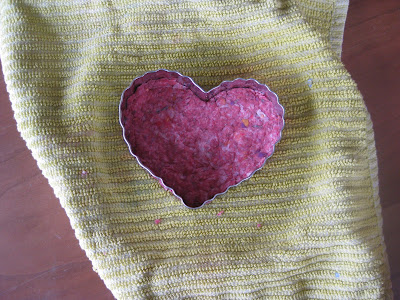
While using the molds I also wondered if this activity could be done with a cookie cutter so we tried that too. We used the same sponge method for removing water. (For this paper we used red, purple and yellow construction paper with the paper towels- and F.Y.I. -a little construction paper goes a long way.)
The next day we decorated the molded paper. We used watercolors on one.
The cookie cutter mold is on the top left and came out pretty good. I found the molded paper also looks attractive left as is.
We also decorated with glitter...lots and lots of glitter. Overall, my daughters loved making these because of the involved process of tearing paper, using a blender, sticking hands in water paper mess and sponging water up. The decorating was just as fun too.


3 comments:
This is so neat and I will do it when I can find something like this to use. I used to have a ceramic shop and wished I knew about it back then. Thanks for sharing. Jean
You’re extremely magnificent! You know what to put and how
to gather your readers. I appreciate you and for writing a well – written article,
informational.
www.n8fan.net
Those look interesting. Keep posting.
www.imarksweb.org
Post a Comment